
Projecting your iPads - Things to know

How to project your iPad
(This post is assuming your iPad has been updated to iOS 7)

On your laptop
  1. Type AirServer
  2. Click on AirServer
Note: AirServer may already be running on your laptop.  This initial step should have to be done only once.  You will set this program to automatically run in a following step.


Return to your desktop (Hint: you can hit the Windows key + D to quickly return to the desktop.)
  1. Click the small up arrow in the lower right corner of your screen.  This will reveal the hidden icons.
  2. Right click on the AirServer icon then click Settings.


  1. Check for updates... you need to be running version 1.9.1.0 or above.
  2. Make sure Start AirServer when anyone logs into Windows is checked.  This will automatically launch the software when you log into the computer.


On your iPad
  1. Use one finger to swipe up to reveal the taskbar.
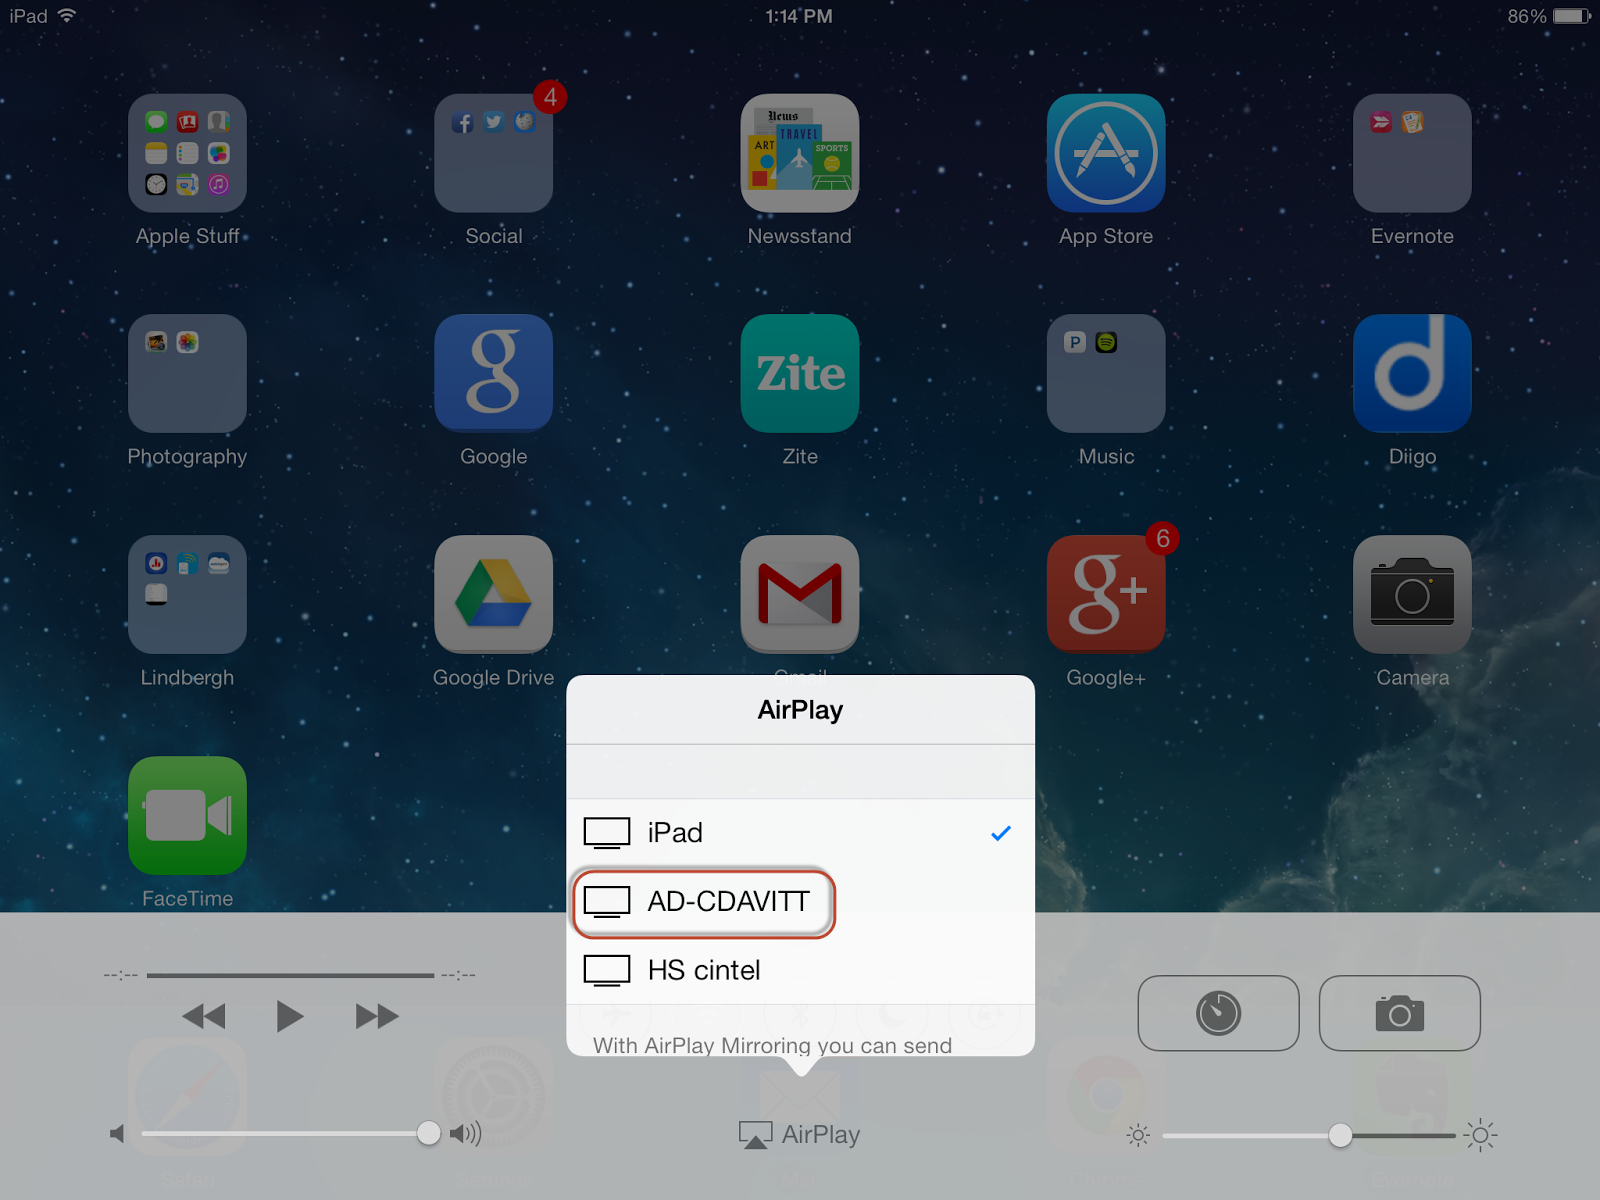
  2. Click AirPlay


Find your name on the list and click on it.
Note: There tends to be 15-20+ teachers on this list.

Toggle mirroring on.


You should see your iPad appear on the laptop.  This process will allow you to project the images and sounds of your iPad through your LiNC system.

Comments

  1. Thanks for your help. Here is one mysterious thing.....so my airserver on my laptop says it is up to date but the version it is running is 1.1.8.0. Everything works but just thought I would let you know. Wanted to share some ways I use it. I love sharing an app with the staff-in fact we are going to use it this week. Thanks!

    ReplyDelete
    Replies
    1. It will do that from time to time. I just downloaded the update directly from the website. Thank you so much for leaving a comment!!!

      Delete

Post a Comment

Popular posts from this blog

Like your ELMO but with an iPad (elementary classroom teachers)

I used AirServer to create the infinity mirror effect. We were in a meeting today and Dominic told us about this fantastic idea. As we discussed all things technology he explained one method of using the iPad as a portable ELMO. It was too cool not to share. Step 1 Make sure you have AirServer running on your laptop. 1. Click the Windows key on your keyboard or click the icon in the lower left of your screen. 2. Just start typing AirServer. 3. Click AirServer. Don't see it? Contact technology or your building tech person. Step 2 Connect your teacher iPad to your laptop. 1. Swipe up from the bottom of the screen. Start by swiping in the bezel, the black plastic part surrounding the screen. 2. Click AirPlay Mirroring. 3. Click your name. Step 3 Open the camera app and instant portable ELMO! Anything you see in the camera's len will be broadcast to the big screen. I just used this method to take a picture of my notebook as a demonstration of how co

Who is emailing me? The Blue Man Group??? (Add an image to your Google account.)

WHY It is always nice to put a face with a name. Sometimes we need a tiny little reminder of what someone looks like because we don't see them very often. Follow these steps to add/change the image associated with your Google account. HOW Open your email. Click your image. It might just be a blue circle if you have not added something already. Click Change . Find an image you like. Your amazing new image will appear. From now on everyone can put a name to a face!

Annotate PDF? How might I do that?

So I have a PDF and I need to edit it. Here is one method that works pretty well for me. Open Word. Click File .  1. Click Open . 2. Click Browse . 3. Find the PDF you want to annotate. 4. Click Open . Click OK when you see this box. Bam! Your PDF now opens in Word. Note: you maybe have to click Enable Editing at the top of the screen. Finished editing and want to turn it back into a PDF? Click File . 1. Click Save As . 2. Click This PC . 3. Pick a location. I usually save things to my desktop. 4. Click Save as type - and choose PDF. 5. Click Save .