
Using the iPad screen recorder and uploading the video to Canvas.


This post will show you how to use the iPad screen recorder and upload it to an assignment in Canvas.

The first step is making sure the screen recorder is available in the Control Center.

Start by opening the Settings on your iPad.

1. Click Control Center on the left.
2. If you see Screen Recording listed in the More Controls section, click the small plus symbol.


Make sure you can see Screen Recording listed in the Included Controls section.

To open the screen recorder, drag your finger from the upper right corner in a downward angle like the arrow.

Click the Screen Recording button.

Tripple check, you will need to make sure you have clicked the microphone on. I have created a bunch of recordings and half the time I forget to turn the mic on.

1. I can tell my mic is ready because it is red and says ON.
2. Click Start Recording when ready.

I can tell it is recording when I see Screen Recoding turn red at the top and it will say Stop Recording at the bottom.
I now click into the screen and pull up my presentation.

I pull down the Control Center and click the recording button to stop.

You will see a notification pop up stating that the recording has been put into Photos. I click the notification to pull up the recording.

To share the video to Canvas, click the sharrow. (the share arrow)

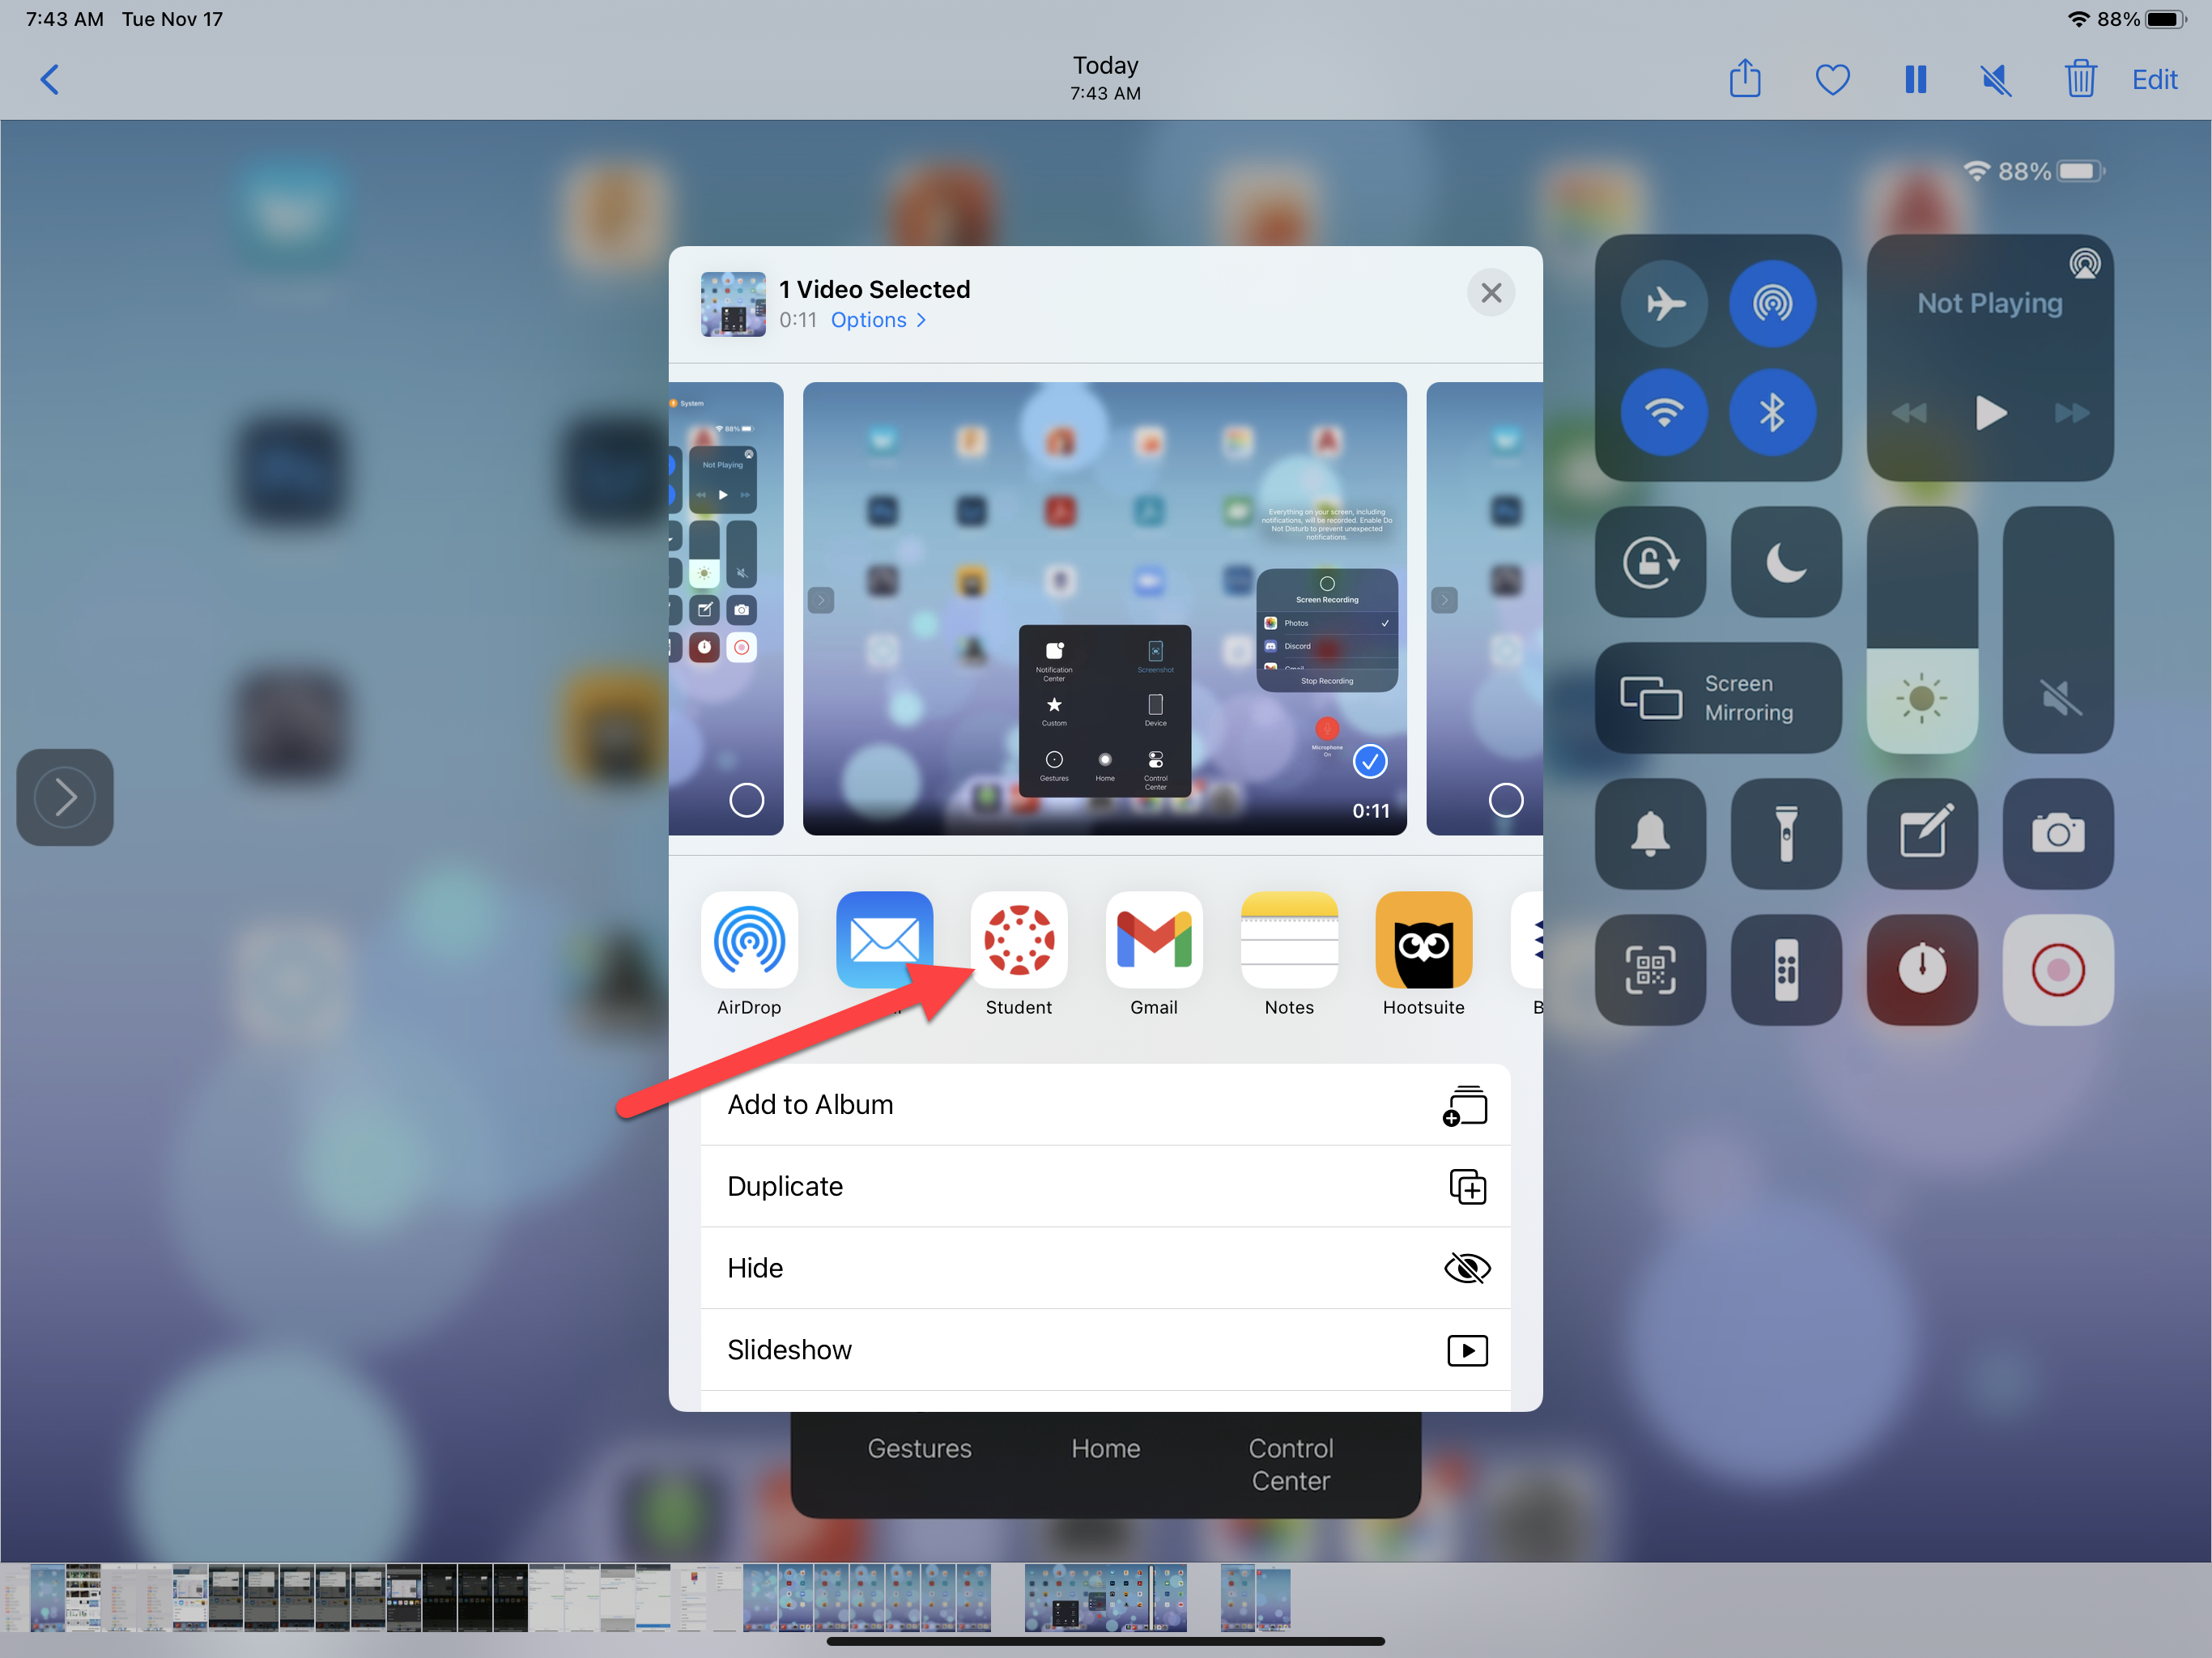
Click the Canvas icon.

1. Fill in and select.
2. Click Submit.

I would always recommend double-checking to make sure it has submitted. If you have any wifi issues it might not actually submit.
1. I can tell something uploaded, it gives me the message that it was uploaded successfully.
2. I can also click this green button to resubmit if needed.

You can also use the screen recorder, google slides, and camera to present as shown in this video.

Comments

Popular posts from this blog

Like your ELMO but with an iPad (elementary classroom teachers)

I used AirServer to create the infinity mirror effect. We were in a meeting today and Dominic told us about this fantastic idea. As we discussed all things technology he explained one method of using the iPad as a portable ELMO. It was too cool not to share. Step 1 Make sure you have AirServer running on your laptop. 1. Click the Windows key on your keyboard or click the icon in the lower left of your screen. 2. Just start typing AirServer. 3. Click AirServer. Don't see it? Contact technology or your building tech person. Step 2 Connect your teacher iPad to your laptop. 1. Swipe up from the bottom of the screen. Start by swiping in the bezel, the black plastic part surrounding the screen. 2. Click AirPlay Mirroring. 3. Click your name. Step 3 Open the camera app and instant portable ELMO! Anything you see in the camera's len will be broadcast to the big screen. I just used this method to take a picture of my notebook as a demonstration of how co

Who is emailing me? The Blue Man Group??? (Add an image to your Google account.)

WHY It is always nice to put a face with a name. Sometimes we need a tiny little reminder of what someone looks like because we don't see them very often. Follow these steps to add/change the image associated with your Google account. HOW Open your email. Click your image. It might just be a blue circle if you have not added something already. Click Change . Find an image you like. Your amazing new image will appear. From now on everyone can put a name to a face!

Annotate PDF? How might I do that?

So I have a PDF and I need to edit it. Here is one method that works pretty well for me. Open Word. Click File .  1. Click Open . 2. Click Browse . 3. Find the PDF you want to annotate. 4. Click Open . Click OK when you see this box. Bam! Your PDF now opens in Word. Note: you maybe have to click Enable Editing at the top of the screen. Finished editing and want to turn it back into a PDF? Click File . 1. Click Save As . 2. Click This PC . 3. Pick a location. I usually save things to my desktop. 4. Click Save as type - and choose PDF. 5. Click Save .