This post was created and used to teach an ELA class at LHS how to shoot and edit video.
In class we examined a sample clip to build a common understanding of how videos are put together, focusing specifically on b-roll, voiceover and transitions. We picked this video because it was shot on an old iPhone.
Viewing 1 of 2
The first time we watched the video focusing on the questions below in their small groups.
What did you see?
What did you notice?
How did it start and how did it end?
Viewing 2 of 2
The second viewing we narrowed our focus to look for specific video and editing techniques. We broke the class into four groups, each focused on just one element.
B Roll - These are shots that usually have voiceover, music or action. Beyond a voiceover, you can't hear people talking in these shots.
Transitions - Pay special attention to how they move from one clip to the next. Is it quick? Do the clips fade into each other?
Voiceover/Sound - Whatever your subject is, it should be heard loud and clear. If there is too much distracting background noise, or the subject is super quiet, the whole video becomes nearly unwatchable. Sound can include voiceovers, background noise, music and more. Be mindful of how far your phone is from the subject.
Lighting - If you are in a basement, the overhead lighting tends to be too harsh. Dim the lights and add a second light source such as a lamp. Natural light is the best as long as you are not shooting into the Sun.
Examples
B Roll
When Lucie was in the grocery she talked about what she was buying and how much things cost. This was the best shot, she was using the calculator app on her phone. While Lucie could have added it in her head, this made the shot more impactful.
While Lucie narrated what and how much a MetroCard costs, you could see her buying the pass. There wasn't any background noise at all, just her voice talking about the pass. The act of buying the card added authenticity.
Transitions
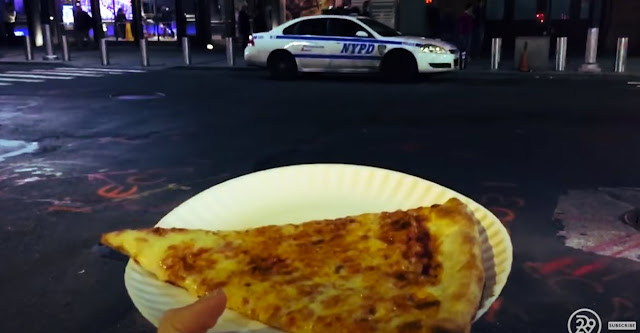
The video cut from the pizza store to Lucie outside just as she said something about the perks of living in New York City. It is framed perfectly with the pizza and a police car. I feel the NYPD logo added a nice New York detail.
The video jumped from Dunkin, to a sign that said coffee to a blurry Starbucks. At the end of the shot the coffee cups where in a tight focus. The quick jumps helped move the story along pretty quickly while maintaining the focus on coffee.
Voiceover/Sounds
Every voiceover was used to help illustrate budgeting in New York. This image showed Lucie walking down a busy street.
This was a great one, comparing the costs of the two solutions and debating which might be the best deal in the long run. I really liked this one because it is relatable to most everyone who has shopped with their own money. What made me nervous was her wallet was on the ground!
Lighting
Notice the light hitting from the right, most likely from a bank of windows. Natural light will paint your subject in a much better light. Having the secondary source from above adds a lot more depth to the shot. Don't forget you can use light to cast something in a negative way with dark shadows.
Similar to the image above, it appears there is plenty of natural light. Lighting is right behind sound in importance. Poor lighting tends to make video look aweful.
Editing
All high school teachers and students have access to the premium version of WeVideo. Your teacher will give you the code if you have not already activated your account. In this section we will highlight a few ideas on how to edit on your Chromebook. While you can do this on a mobile device the screenshots below are from a browser.
Prior to importing your clips, create a Drive folder. This folder is where you should upload all your videos. It will make the whole editing process much faster. Please make sure you name your folder something easy to remember like ELA Video 22.
Importing
I am assuming you have already shot all your videos on your mobile device.
Pro Tip - Name and number your video clips in Drive before editing them. This will make editing a snap saving you time and effort.
Open the camera roll on your mobile device. Select your images and click Share.
Select Drive.
Find your Drive folder. Make sure all your files and selected. Click Save.
Check notifications. Make sure it shows you are uploading all the files you selected. Every once in a while it will only upload one of the selected videos.
Basic Editing
Login at wevideo.com You MUST use your school Google account when logging in.
Click Projects.
Click the blue plus in the lower right.
Title your project and add a simple description.
Choose the project type and click Next. For this project I selected Collaborative so I can work with my team.
I now can invite others to start editing with me if I send them a link. The link will be on one of the following screens.
If you forget to send the link, it can be found in the lower left of the editing screen.
To start importing your clips, click the big blue button in the upper left.
Then click My Media.
Click the Google Drive icon.
Shift + Click to select all your clips.
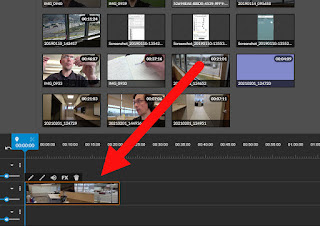
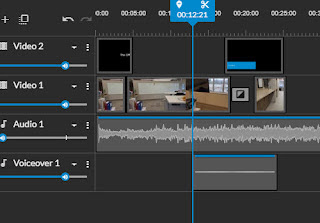
Once imported, drag them in order to the timeline below.
The key to any good video is editing. To split your clips, move the blue play head and click the scissors. Select the part you want removed and delete it.
You can also click on the clip for more editing tools.
Transitions
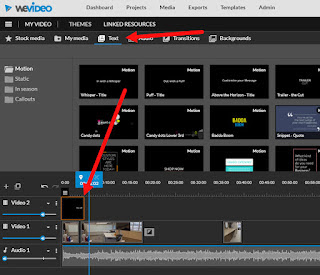
Click Transitions.
Choose and drag to the time line.
Pro Tip - choose one transition and stick with it.
Click the transition to open the editing panel. You might need to increase the duration.
Audio - Music and Voiceovers
Music
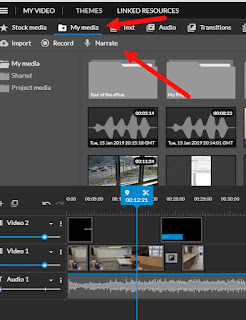
1. Click Audio.
2. Choose a folder/type.
3. Drag to timeline. It is recommended to turn the volume way down so the music does not overpower the voice.
Pro Tip - Search for Sound Effects. There are a ton of sounds you could layer in to make whatever you are showing appear richer.
Voice
Before recording your voice over, please control for background noise. Recording in the classroom tends to be a tad too noisy.
To add a voice over, click My Media and then Narrate.
If it asks, give access to WeVideo.
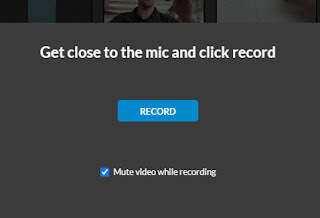
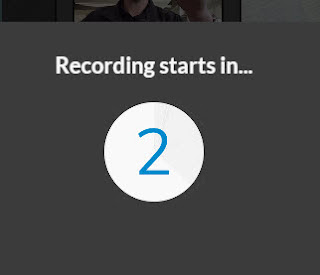
Rehearse, when ready click Record.
It should give you a 3 second countdown.
The video will play on the right. Click Stop when finished.
Preview then save.
The clip will appear at the bottom of your timeline.
You can adjust the volume if it is too loud or soft.
Adding Text
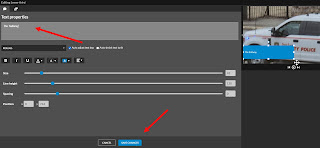
Click Text.
Select and drag to the timeline.
Click to edit and then save.
Double check to make sure you can see it in the video. Sometimes light text on a light background isn't a good idea.
Picture in Picture
Drag an image or another video clip to the track above your main videos.
Adjust the corners, drag it smaller and move the smaller clip to somewhere on the screen. This is similar to what the news does to add images and other videos to help tell a bigger story.
The system will email you when it has been published. Turn that link in to Canvas.
Be advised... sometimes publishing can take more than a few minutes. It is not a good idea to wait until just before the project is due to publish it, there might not be enough time.
Other great examples can be found on real estate websites. Selling a home is kinda like shooting a documentary. There are a ton of great examples, especially how they use text to highlight the best parts of a room.
You will be away from your classroom for a bit and probably won't be checking email on a regular basis. Wouldn't it be nice to have Gmail respond for you alerting whoever is emailing that you out enjoying your summer? Setting up your vacation responder is pretty simple, a few clicks and a save. Start by clicking the gear icon in the upper right corner of Gmail. Scroll way down the page. Look for the vacation responder section. 1. Click to turn the responder on. 2. Add your first and last days away. We would recommend adding something short and to the point for the subject line. 3. Whatever you add here will be the body of the email you are automatically sending out. It would be a good idea to tell them when you are planning on returning and who to call if they need immediate assistance. We also recommend not checking the two buttons at the bottom. 4. Save changes . That is it. Now your inbox will automatically alert people that you are not in your...
WHY It is always nice to put a face with a name. Sometimes we need a tiny little reminder of what someone looks like because we don't see them very often. Follow these steps to add/change the image associated with your Google account. HOW Open your email. Click your image. It might just be a blue circle if you have not added something already. Click Change . Find an image you like. Your amazing new image will appear. From now on everyone can put a name to a face!
So I have a PDF and I need to edit it. Here is one method that works pretty well for me. Open Word. Click File . 1. Click Open . 2. Click Browse . 3. Find the PDF you want to annotate. 4. Click Open . Click OK when you see this box. Bam! Your PDF now opens in Word. Note: you maybe have to click Enable Editing at the top of the screen. Finished editing and want to turn it back into a PDF? Click File . 1. Click Save As . 2. Click This PC . 3. Pick a location. I usually save things to my desktop. 4. Click Save as type - and choose PDF. 5. Click Save .


Comments
Post a Comment