Can you make a documentary that will move people?

 This post was created to help with creating documentaries in an English PBL class. We will be using WeVideo as the production tool.

In class, we watched the video below to build a common understanding of how documentaries are put together and address the audience.

The first time we watched the film we split into teams of two. Our goal was to help answer these big questions.

Viewing 1 of 2

What was the purpose of this video?

  • to answer a question
  • to shed light on an unclear topic
  • to present a new argument on a topic
  • to improve society by sharing this knowledge
  • to entertain the viewer
  • to uncover a hidden truth or meaning
  • to connect to a thematic truth about society

What did the creators do to achieve the purpose of their video?

  • appeal to emotions?
  • facts or evidence?
  • visuals or voice used?


Viewing 2 of 2

The second time we narrowed our focus to look for specific video and editing techniques. We broke into four small groups, each focusing on one element.

Our focal points:
  • Sound - Whatever your subject is, it should be heard loud and clear. If there is too much distracting background noise, or the subject is super quiet, the whole video becomes nearly unwatchable. Sound can include voiceovers, background noise, music and more. Be mindful of how far your phone is from the subject. 
  • Lighting - If you are in a basement, the overhead lighting tends to be too harsh. Dim the lights and add a second light source such as a lamp.
  • B Roll - These are shots that usually have voiceover, music or action. Beyond a voiceover, you can't hear people talking in these shots.
  • Background - What is behind the subject? A blank background is exceptionally boring, can you move them in front of a bookshelf? 

Examples

Sound
They got a tight shot of mixing the soap and you could hear the drill.

Light
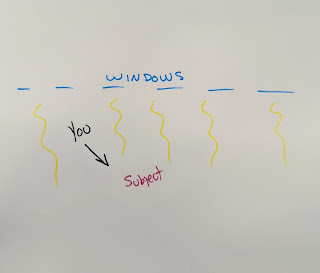
Be mindful of where the Sun is located when you are shooting. It is recommended to make sure the Sun is at your back so the full rays can illuminate your subject.

This was a shot panning from left to right. Look how the light plays across the soaps.

B Roll
While mom was describing the work environment they showed the soaps being packaged. 

Mom described Sam's day.

Background
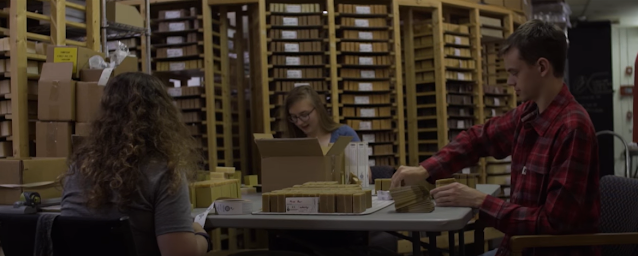
The soap behind mom helped paint a big picture.

The wall and soap racks behind Sam helped created depth and understanding.


Editing

All high school teachers and students have access to the premium version of WeVideo. Your teacher will give you the code if you have not already activated your account. In this section we will highlight a few ideas on how to edit on your Chromebook. While you can do this on a mobile device the screenshots below are from a browser.

Prior to importing your clips, create a Drive folder. This folder is where you should upload all your videos to. It will make the whole editing process much faster. Please make sure you name your folder something easy to remember like ELA PBL 22.

Importing

I am assuming you have already shot all your videos on your mobile device.

Open the camera roll on your mobile device. Select your images and click Share.


Select Drive.


Find your Drive folder. Make sure all your files and selected. Click Save.


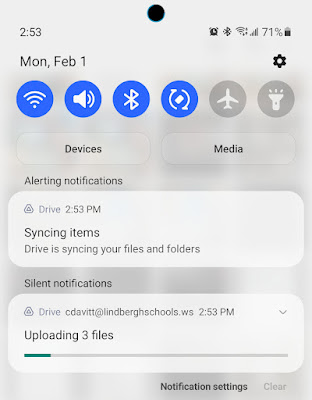
Check notifications. Make sure it shows that you are uploading all the files you selected. Every once in a while it will only upload one of five selected videos. 


Basic Editing

Login at wevideo.com
Click Projects.

Click the blue plus in the lower right.

Title your project and add a simple description.
Choose the project type and click Next. For this project I selected Collaborative so I can work with my team.

I now can invite others to start editing with me if I send them a link. The link will be on one of the following screens.

If you forget to send the link, it can be found in the lower left of the editing screen.

To start importing your clips, click the big blue button in the upper left.

Then click My Media.

Click the Google Drive icon. 

Shift + Click to select all your clips.

Once imported, drag to the timeline below.

he key to any good video is editing. To split your clips, move the blue play head and click the scissors.

You can also click on the clip for more editing tools.


Transitions

Click Transitions.
Choose and drag to the time line.
Pro Tip - choose one transition and stick with it.

Click the transition to open the editing panel. You might need to increase the duration.


Audio - Music & Voiceover

Music

1. Click Audio.
2. Choose a folder/type.
3. Drag to timeline.

Voice

To add a voice over, click My Media and then Narrate.

If it asks, give access to WeVideo.


Rehearse, when ready click.


It should give you a 3 second countdown.


The video will play on the right. Click Stop when finished.


Preview then save.


The clip will appear at the bottom of your timeline.

Adding Text

Click Text.
Select and drag to the timeline.

Click to edit and then save.


Publishing

Click Finish when done with the project.


Name it and be super specific.


The system will email you when it has been published. Send that link to your teacher.


Need more help?

Check out the WeVideo YouTube channel. 

Other great examples can be found on real estate websites. Selling a home is kinda like shooting a documentary. There are a ton of great examples, especially how they use text to highlight the best parts of a room. 

WeVideo created this page to help answer some of the most common questions and issues.
Comments

Popular posts from this blog

Who is emailing me? The Blue Man Group??? (Add an image to your Google account.)

WHY It is always nice to put a face with a name. Sometimes we need a tiny little reminder of what someone looks like because we don't see them very often. Follow these steps to add/change the image associated with your Google account. HOW Open your email. Click your image. It might just be a blue circle if you have not added something already. Click Change . Find an image you like. Your amazing new image will appear. From now on everyone can put a name to a face!

Annotate PDF? How might I do that?

So I have a PDF and I need to edit it. Here is one method that works pretty well for me. Open Word. Click File .  1. Click Open . 2. Click Browse . 3. Find the PDF you want to annotate. 4. Click Open . Click OK when you see this box. Bam! Your PDF now opens in Word. Note: you maybe have to click Enable Editing at the top of the screen. Finished editing and want to turn it back into a PDF? Click File . 1. Click Save As . 2. Click This PC . 3. Pick a location. I usually save things to my desktop. 4. Click Save as type - and choose PDF. 5. Click Save .

Embed an audio clip into a Google Form!

Are you looking to embed an audio clip into a Google Form? Below you will find a list of things you will need ready and a video to walk you through the process. Needed: A single PowerPoint slide. Movie Maker. (Already on your computer.) A Google Form. Watch this video for the steps to follow.