
Documenting Learning: Video Shorts (9-12) Summer 2022

This post was created to support our summer learning.

In this class we will:

  • learn the mechanics of WeVideo
  • explore simple ways we can use our mobile devices to shoot video
  • understand some of the issues students run into when using WeVideo
  • plan for using WeVideo in the fall

Getting Started

In class, we will create a 3 Word Story, a simplified version of the 6 Word Story we used in ELA during the 21-22 school year.

Prompt:

Create a video that is no more than 30 seconds. The video will teach us something about you that we might not already know or something we would find interesting. The video must contain three words that are unspoken, meaning we must see them represented somehow physically on the screen. 

Example:

Two Fast Skills

We could spend all summer learning how to shoot great video and using WeVideo to edit into something that would win awards.

Today we will just focus on how to shoot a decent shot and edit it.

Planning


We created this organizer to help you plan your shots. When you plan your shots your workload is nearly cut in half and it makes the end product 47% more impactful.

Shooting

There are three quick ideas that we will share during the session to help target some high-impact ideas that are easy to use when shooting video.

Shots - check this post for the post we used in class

  • Wide Shot - a long shot showing the full subject/person and their relation to the surroundings.
  • Medium Shot - medium distance, a waist shot
  • Close Shot - tight in to the subject/person

Lighting

  • Lighting - try to always have the sun at your back or two sources of light if shooting indoors.

Angles

  • High Angle - down on the subject from above
  • Eye-Level - directly at the subject's eye level
  • Low Angle - shot from below the eyeline

Editing

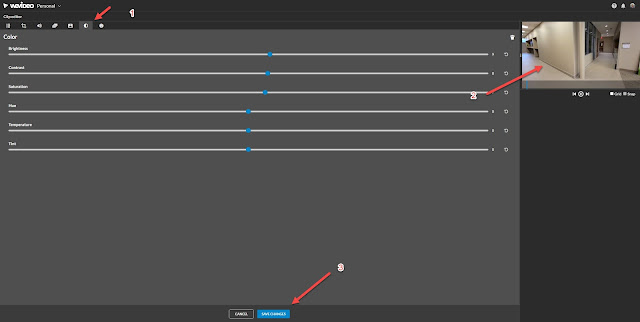
All high school teachers and students have access to the premium version of WeVideo. Your teacher will give you the code if you have not already activated your account. In this section, we will highlight a few ideas on how to edit on your laptop. While you can do this on a mobile device the screenshots below are from a browser.

You must use your school Google account when you log into WeVideo to get the premium version.

Prior to importing your clips, create a Drive folder. This folder is where you should upload all your videos. It will make the whole editing process much faster. Please make sure you name your folder something easy to remember like Summer 22 WeVideo.

Importing

I am assuming you have already shot all your videos on your mobile device.

Pro Tip - Name and number your video clips in Drive before editing them. This will make editing a snap saving you time and effort.

Open the camera roll on your mobile device. Select your images and click Share.


Select Drive.


Find your Drive folder. Make sure all your files and selected. Click Save.


Check notifications. Make sure it shows you are uploading all the files you selected. Every once in a while it will only upload one of the selected videos.

Basic Editing

You must log in with your school Google account.

Click Projects on the left side.

Click the plus symbol in the upper right.

1. Fill in the blanks. Be super-specific.
2. Click Collaborative.
3. Click Next.

Choose Invite with link, then click Next.

Click Next.

1. Copy and share the link.
2. Click Create Video.

Importing Your Clips from Drive
Click Import.

Click the Drive icon.

1. Shift + Click to select all your clips.
2. Click Select to begin the import process.

The import process will take a few seconds to a few minutes. When they are fully imported images will replace the blue square.

Start Editing the Imported Clips
Drag the clips in order to the Video 1 track.

Trimming and Adjusting Clips
To trim, or split, a clip move the play head into position.
Click the scissors.

To delete, click and hit backspace or delete on your keyboard.

Double click on a video clip.
Click the 1/2 circle icon along the top row.
You can adjust the color of a clip to add needed effects.
Click Save Changes.

Adding Transitions
If you want the clips to immediately appear one after the next, do not add a transition. If you are looking to softly move from clip to clip, keep reading.
1. Click Transitions on the far left.
2. Drag one in-between two clips. Transitions can only be added between clips.


Double click on the transition to edit it. Most often people adjust the duration.

Adding Audio - Music and Sound Effects

  1. Click Audio.
  2. Search for a theme - like sad.
  3. Click a clip that looks interesting.
  4. You will hear the clip play, use the controls to pause/play.
  5. Like what you hear? Drag it to the Audio track. You can trim the audio just like you did with the video.


To add a sound effect.
1. Click the plus symbol to add Audio Track 2.
2. Search for a sound you want to add.
3. Drag it to the timeline and line it up to where you want it to appear.

Adding Images
1. Click Images on the far left.
2. Search for an emotion. Find the image and drag it to the timeline.

Adding Text
1. Click Text.
2. Choose the text style you want to use.
3. Be mindful, not all text will work well with your clip. Make sure you can see it well.
4. Drag it to the text section of the timeline.

1. Double-clicking will open the editing section. Edit the text.
2. Make sure you can see it on your video.
4. Click Save Changes.

Black & White
To change a clip to black and white, start by clicking the clip. Then select FX.

1. Click Black & White.
2. Click Apply.

If you want to really spice it up, double click and adjust. You can a real layer of grunge to the clip. Don't forget to click Save Changes at the bottom.


Publishing
1. Click Finish.

1. Name your project.
2. Click Set.

1. Leave it set to SD, it will save you time.
2. Select Drive.
3. Click Export. You will receive an email when the process is completed.


Be advised... sometimes publishing can take more than a few minutes. It is not a good idea to wait until just before the project is due to publish it, there might not be enough time.

Need More Help?

Check out the WeVideo YouTube channel. 

Other great examples can be found on real estate websites. Selling a home is kinda like shooting a documentary. There are a ton of great examples, especially how they use text to highlight the best parts of a room. 

WeVideo created this page to help answer some of the most common questions and issues.


Comments

Popular posts from this blog

Like your ELMO but with an iPad (elementary classroom teachers)

I used AirServer to create the infinity mirror effect. We were in a meeting today and Dominic told us about this fantastic idea. As we discussed all things technology he explained one method of using the iPad as a portable ELMO. It was too cool not to share. Step 1 Make sure you have AirServer running on your laptop. 1. Click the Windows key on your keyboard or click the icon in the lower left of your screen. 2. Just start typing AirServer. 3. Click AirServer. Don't see it? Contact technology or your building tech person. Step 2 Connect your teacher iPad to your laptop. 1. Swipe up from the bottom of the screen. Start by swiping in the bezel, the black plastic part surrounding the screen. 2. Click AirPlay Mirroring. 3. Click your name. Step 3 Open the camera app and instant portable ELMO! Anything you see in the camera's len will be broadcast to the big screen. I just used this method to take a picture of my notebook as a demonstration of how co

Who is emailing me? The Blue Man Group??? (Add an image to your Google account.)

WHY It is always nice to put a face with a name. Sometimes we need a tiny little reminder of what someone looks like because we don't see them very often. Follow these steps to add/change the image associated with your Google account. HOW Open your email. Click your image. It might just be a blue circle if you have not added something already. Click Change . Find an image you like. Your amazing new image will appear. From now on everyone can put a name to a face!

Annotate PDF? How might I do that?

So I have a PDF and I need to edit it. Here is one method that works pretty well for me. Open Word. Click File .  1. Click Open . 2. Click Browse . 3. Find the PDF you want to annotate. 4. Click Open . Click OK when you see this box. Bam! Your PDF now opens in Word. Note: you maybe have to click Enable Editing at the top of the screen. Finished editing and want to turn it back into a PDF? Click File . 1. Click Save As . 2. Click This PC . 3. Pick a location. I usually save things to my desktop. 4. Click Save as type - and choose PDF. 5. Click Save .