
We have been using FimoraGo for the past few years to create video projects in the classrooms. There are a ton of choices in each app store but this is one that we have found to work on iOS and Android devices.
This post was used in a FACS classroom at the high school. The ideas presented could be adapted to be used in any subject or grade.
WARNING!
- We would advise you to have a minimum of one gig of free storage on your device before you start creating your project. Trust us, we learned the hard way. Use Google Photos to back all your images and videos to free up device space. It is also the easiest way to back up all your FACS videos.
- Do not delete any files off your device until the project has been uploaded YouTube and submitted for a final grade.
WARNING!
Pumpkin Pie Bread Pudding
We watched this short Tasty video twice. The first time we just watched without context. For the second viewing, we broke up into small focus groups. Each group had just one thing to watch for. The big goal was to pick out some very specific things they could reproduce in their own videos.
Groups
- camera angle and movement
- sound/audio
- lighting
- cuts
- identification of the audience
It is easy to overlook the simple cuts and techniques the Tasty videos use to make the process look simple. We took just a few minutes of class time to highlight a few ideas the students could use to increase the production value of their video.

Most of the video was shot from above.
The ingredients are listed in the upper right as it is added.
The contrast of the colors makes the shots much more interesting.

The final three items are added in an extreme close up.

The concluding shots consist of the bread pudding just before it was served.
T.H.I.N.K.
This acronym was designed to help when shooting on a mobile device. Without proper planning, the videos usually do not turn out very well.
- shooT with this storyboard or that storyboard (the single element that will make your video better)
- Hold that camera steady
- Interesting surroundings
- Not too soft, not too loud
- Know your audience/subject
Editing
Pay super close attention to your storyboard. If you can capture superior raw footage your editing shouldn't take too long. Trust me, editing takes way too long if your shots are not very good or well planned.
The screenshots below use the app called FilmoraGo, a free iOS and Android app. If you are using an iPad, make sure you search the store for the app under the iPhone Only settings.
Android

Click Create New Video.


1. Click on Video to access your files.
2. Click the circle to find your files.
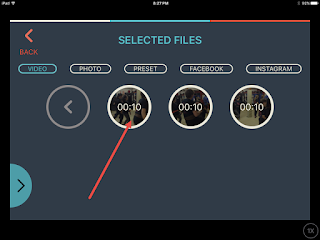

Click on one of the files you want to add to the project.
Repeat until all your clips have been added.


Repeat until all your clips have been added.

1. How many clips have been added to the project.
2. Set the starting and ending points of the clips. This is a great way to trip the clip down a little bit.
3. Click add when you have your clip ready to go. Then hit the next button in the upper right corner.

1. Select the clip you want to edit.
2. Scroll left and right to find options. You can find things like titles and voiceover.
3. Click when you are ready to go.


Add a transition to help ease from one clip to the next.

Transitions
1. Scroll to find the effect you like. Click to apply.
1. Scroll to find the effect you like. Click to apply.
2. Select Apply All to add same effect to all clips.
3. Click the check when you are finished.


Click Save to finalize the video.


The exporting process will take a while. It all depends on the age of the mobile device and how long the video is. It is recommended having the device plugged while it exports.


1. I always save it to the camera roll. I could then upload to YouTube or Google Drive later.
2. You can upload directly to YouTube. Make sure you have created a YouTube channel before you attempt to upload any video. This is what causes the most issues, people forget they need to create a channel which causes the video to fail during the upload process.
iOS - iPad/iPhone

Open the app.
Click Videos.
Select the files and then import.

All tools you need to edit are found at the bottom of the screen.

Sometimes you need to trim your clips.
Click Trim on the bottom toolbar.
Once you trim, click on what you want to delete.
Click the delete button.

One way to make your video pop is to increase the saturation.
With one click you can apply that effect to all your clips.

Just like in the Tasty videos, adding text will help the viewer understand what is happening in the clip.
It would be a good idea to make sure you can see the text on the clips. One way to do that is by changing the color and adding an outline.

Click the sharrow, share arrow, in the upper right when you are ready to finalize your project.

The longer your video, the more time it will take to render it. It would be a good idea to keep your device plugged in throughout this process.

Once you save it to your camera roll, upload it to wherever your teacher told you to.
Comments
Post a Comment